An Interactive Voice Response System in 10 Minutes
In this post I’m going to walk you through deploying a telephony application. If you’ve ever called an automated system, listened to a menu and then pressed 1 to continue then you’ve interacted with a telephony application.
By following this guide you’ll deploy an application that you can call from your own phone that will read a random quote to you, allow you to repeat repeat the quote (by pressing 1) then disconnect (by pressing 2).
I must make many assumptions about you, the reader of this guide, in order to achieve the goal set by the title of this guide. If you meet my assumptions then I hope that you’ll be able to get your first applicaiton up and running in a very, very short time.
If you’re a developer and you have a Ruby on Rails environment set up, you should be good to go.
If you don’t, don’t worry. I will provide more details about what to do in subsequent posts. So if you can’t get your app deployed in 10 min, don’t despair! You’re probably still only a few steps away, look for more details in future posts. Failing that, drop me (Kyle Burton) a line and I’ll help you work through things.
Anxious to pick up your phone and call your application? Then lets get ’er done!
Deploing your First Application

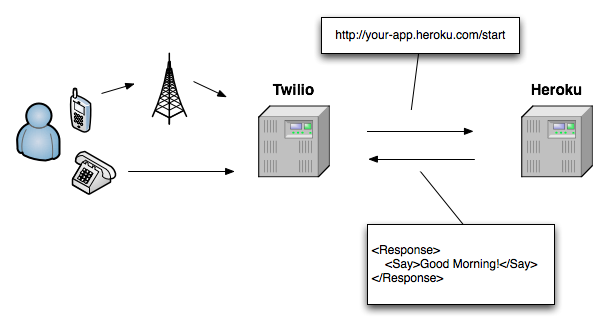
We’re going to make and deploy an application that you can call with your phone and it will speak to you. All the parts string together something like this:
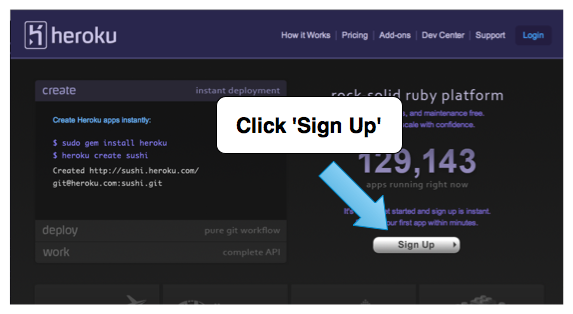
1. Sign up for Heroku
Heroku is a PaaS (Platform as a Service) provider. They graciously allow you to create an deploy an application for free (as long as it doesn’t take up many of their resources – and what you’re about to do fits that bill).
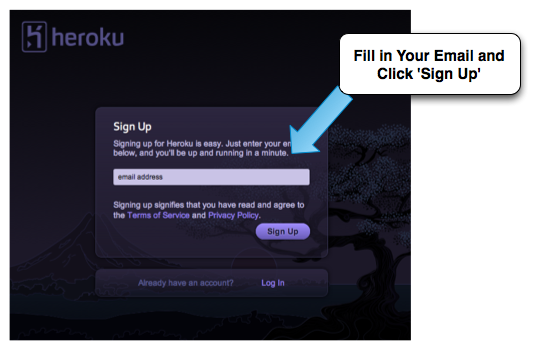
Click Here to head to their home page and start the process.
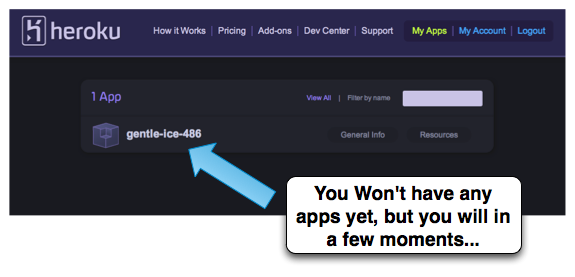
You should then be shown your ‘applications page’.
Grab The Source Code For This Guide
 You will need Git installed and have a connection to the Internet.
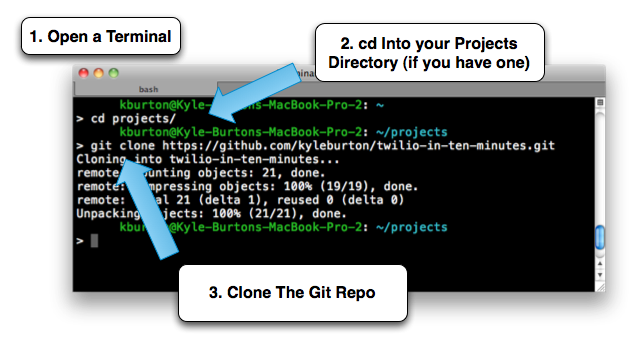
The URL to the git repository is: https://github.com/kyleburton/twilio-in-ten-minutes.git
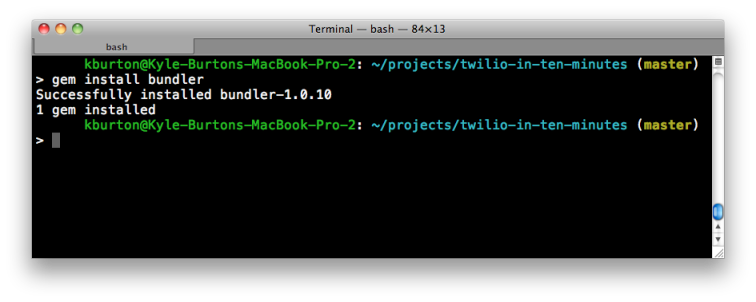
Install the bundler gem
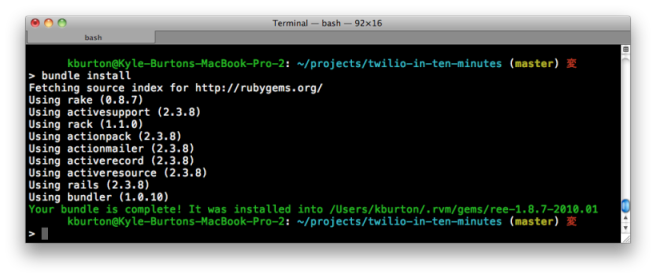
Run bundle install
Run heroku create
When prompted, enter the credentials you created when you signed up in the earlier step:
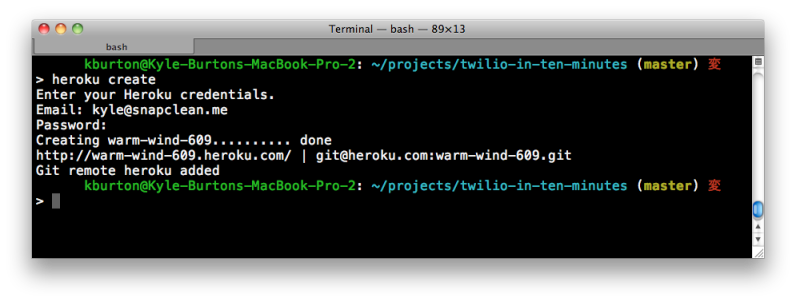
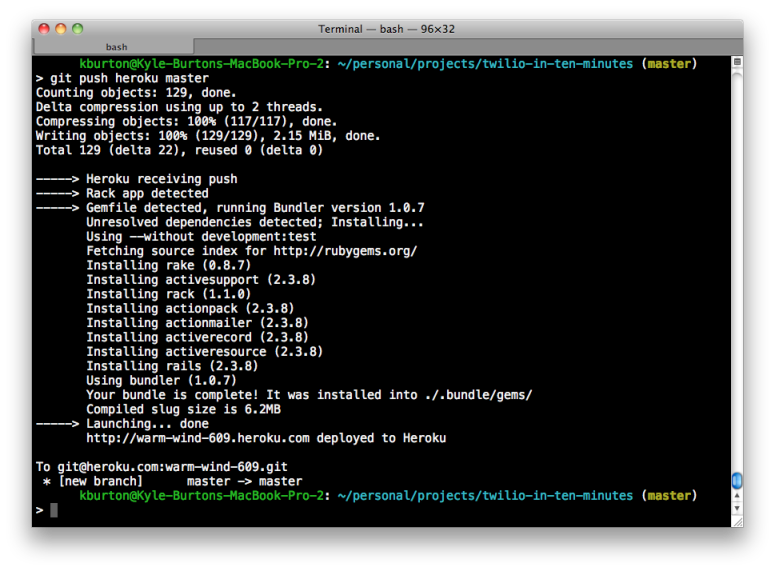
Note your application’s url, this will be vital for when you sign up for Twilio. For my example application, as seen in the screenshot above, it is http://warm-wind-609.heroku.com/. Yours will be different.
Heroku automatically added your application’s git remote to your local git repository.
Push the application code to heroku:
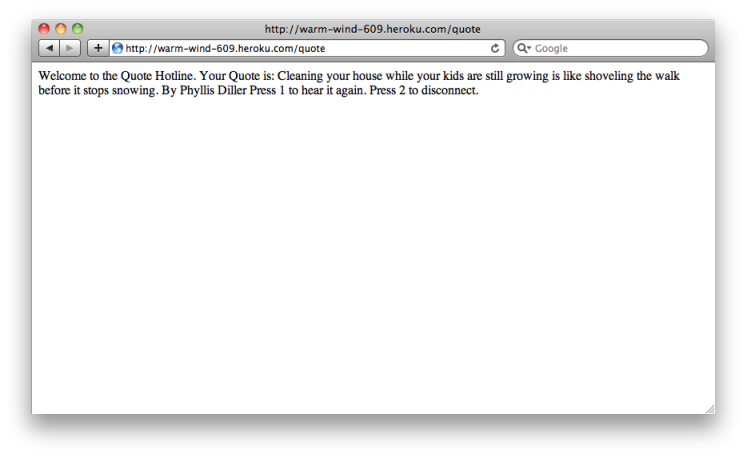
Open the App in your Browser
This is to ensure it’s working. Enter the url for your Heroku instance, make sure you append on ‘/quote’ so it routes to the right controller. You should see a random quote:
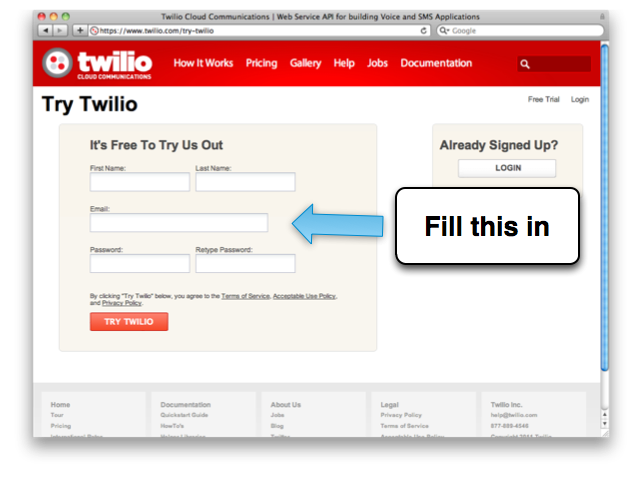
Sign up for the Twilio free trial.
Click Here to head to their main page.

Configure Twilio’s Voice URL
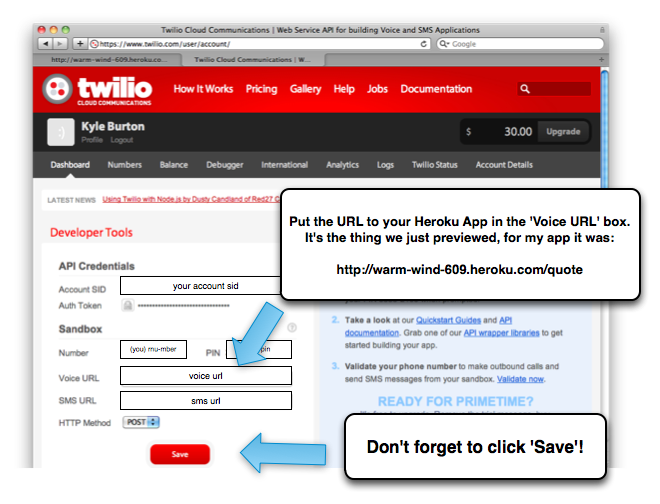
Quick! Call Your Application!
You’ve now got an application deployed on Heroku, and have integrated it with Twilio. When you call The number at Twilio, it will make a call to your applicaiton at Heroku, which will tell it what to say.
Grab your phone and call your app. Call the phone number that was on your Twilio account page, enter the PIN (from the same page) and you should hear your very own application read a random quotation to you.Conclusion
Hopefuly there were no kinks and you have your first application deployed. In the next post I’ll walk through how to make changes to the application.